We’ve been trying to communicate with the ODrive via CAN with a CAN Bus Analyser.
We’ve been unable to communicate from the Analyser to the ODrive. We see data being transferred with an oscilloscope, but we think the ODrive is not interpreting it correctly, or better, that what we send is encoded in the wrong way to accomodate for ODrive’s specific protocol.
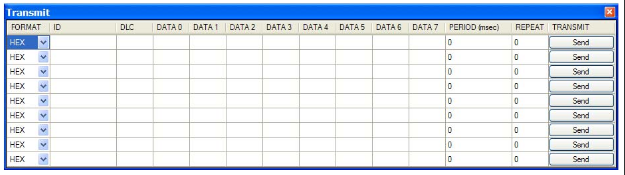
In the figure above, for reference, we are setting the CAN address of the ODrive (3), and telling the analyser to send a message of 1 byte length containing the message to be received by the ODrive.
This is likely not how the ODrive expects it, but I don’t see how else we should generate the message.
We have a similar problem receiving the heartbeat (which we do receive), where the address of the incoming information is thought to be 0x21 rather than 0x03.
Is there something wrong with how we are approaching the communication? Like using the wrong protocol? If so, are there other known tools we could use to test the ODrive from either our PC or from other devices?
As far as we understand, all existing CAN-enabled devices use the same protocol, and they would not match with ODrive’s SimpleCAN.
I don’t have any answer for you. I’m bumping my head on exactly the same place.
My understanding is that the ODrive is expecting floating point numbers, which do not fit within the 8 bit CAN data fields. There is several “standard” ways to break the data up and reassemble it on the other side. (you know the old joke, the best thing about standards is that there is so many to choose from)
So I started down the path of doing that with Excel and the Microchip CAN bus tool and it became unwieldy almost immediately.
Someone else here on the forum was using a different CAN bus tool that let them script the translation (python, I think) which frustrated me as a solution since I can now learn yet another toolchain and buy another tool.
Ultimately I am trying to integrate the ODrive via CAN into an existing project I have which is based on Microchip DSPic 33 parts. So rather than continuing with more CAN buss analyzer tools, I moved over to a test codebase on my other project. Of course at that point several dozen distractions all landed in my lap at the same time and I’ve spent zero further time on this.
I don’t know where you got that impression but it’s certainly not true. CANOpen is popular for devices like this but it’s definitely not the only protocol in existence today.
As for the message IDs, you need to re read the protocol information. Each axis on the odrive has an ID, so make sure you see two heartbeat messages. The ID occupies the upper six bits of the CAN id field, so 0x03 << 5 = 0x60.
Message id 0x21 corresponds to axis id 0x01, message 0x01.
Yeah sorry about the floating point numbers, they’re a pain when converting into CAN. However if you’re using C/C++ (like with an Arduino) it’s as easy as using std::memcpy. If you just want to send a value through one of the basic tools, you have to do the conversion ahead of time. You can use a tool like https://www.h-schmidt.net/FloatConverter/IEEE754.html to do the conversion from float to hex, then you just pack it backwards (Intel byte order). For example 0.1 corresponds to 0x3dcccccd, which would then get packed as 0xcd0xcc0xcc0x3d
Thanks for all your hard work. I’ve finally got my CAN up and running and now I’m working on making a quick arduino script to turn a pos into the CAN format. Started going down the path of the std::memcpy as you recommend but was wondering if you could expand on your pointer?
Update: I got some basic code working. Will update as I make more progress:
union cracked_float_t{
float f;
uint32_t l;
word w[sizeof(float)/sizeof(word)];
byte b[sizeof(float)];
};
Serial.print(F(“The byte value of given float is “));
for (int i = 0; i < 4; i++) {
Serial.print(cf.b[i], HEX);
Serial.print(” “);
}
Serial.println(””);