Hello everybody!
It’s time to start a new thread for my current project. This is a 6DOF motion platform using Odrive.
Some background information:
Looking at the internet and some DIY simulator communities, I found that most 6DOF DIY simulators are really complex constructions, some with huge motors and some with many electronic components and some seem to be very expensive.
I wanted to go an Maybe easier and cheaper way……
After a long research on the web I found the Odrive community and the project “Simulator rig with Odrive” by “Zennix”.
I was thrilled about Zennix’s great work and his working 2DOF simulator that I decided to go that way and follow his footsteps with an Odrive system.
But mechanically, I want to go a Little different way. My simulator should be a system with 6DOF. However, these simulators seem to require a lot of engine power because the actuators must carry all the weight of the platform and the driver. Zennix solved this weight problem by using a balanced system with a pivot point near the center of gravity. In this way, the motors have to work only for the movements.
In order to realize a weight-balanced 6DOF system, I would like to pick up some design ideas from a compressed air powered pogo stick (ask the www for details ), which I built a few years ago for my son from scratch. The air spring works so well and was so easy to build, that I want to implement this in my actuators. Hopefully, the benefit will be that I can reduce the idle load of the actuators to zero or even better to support them in vertical accelaration…
So… lot of information for the first post. More details will come up with progress of the project.
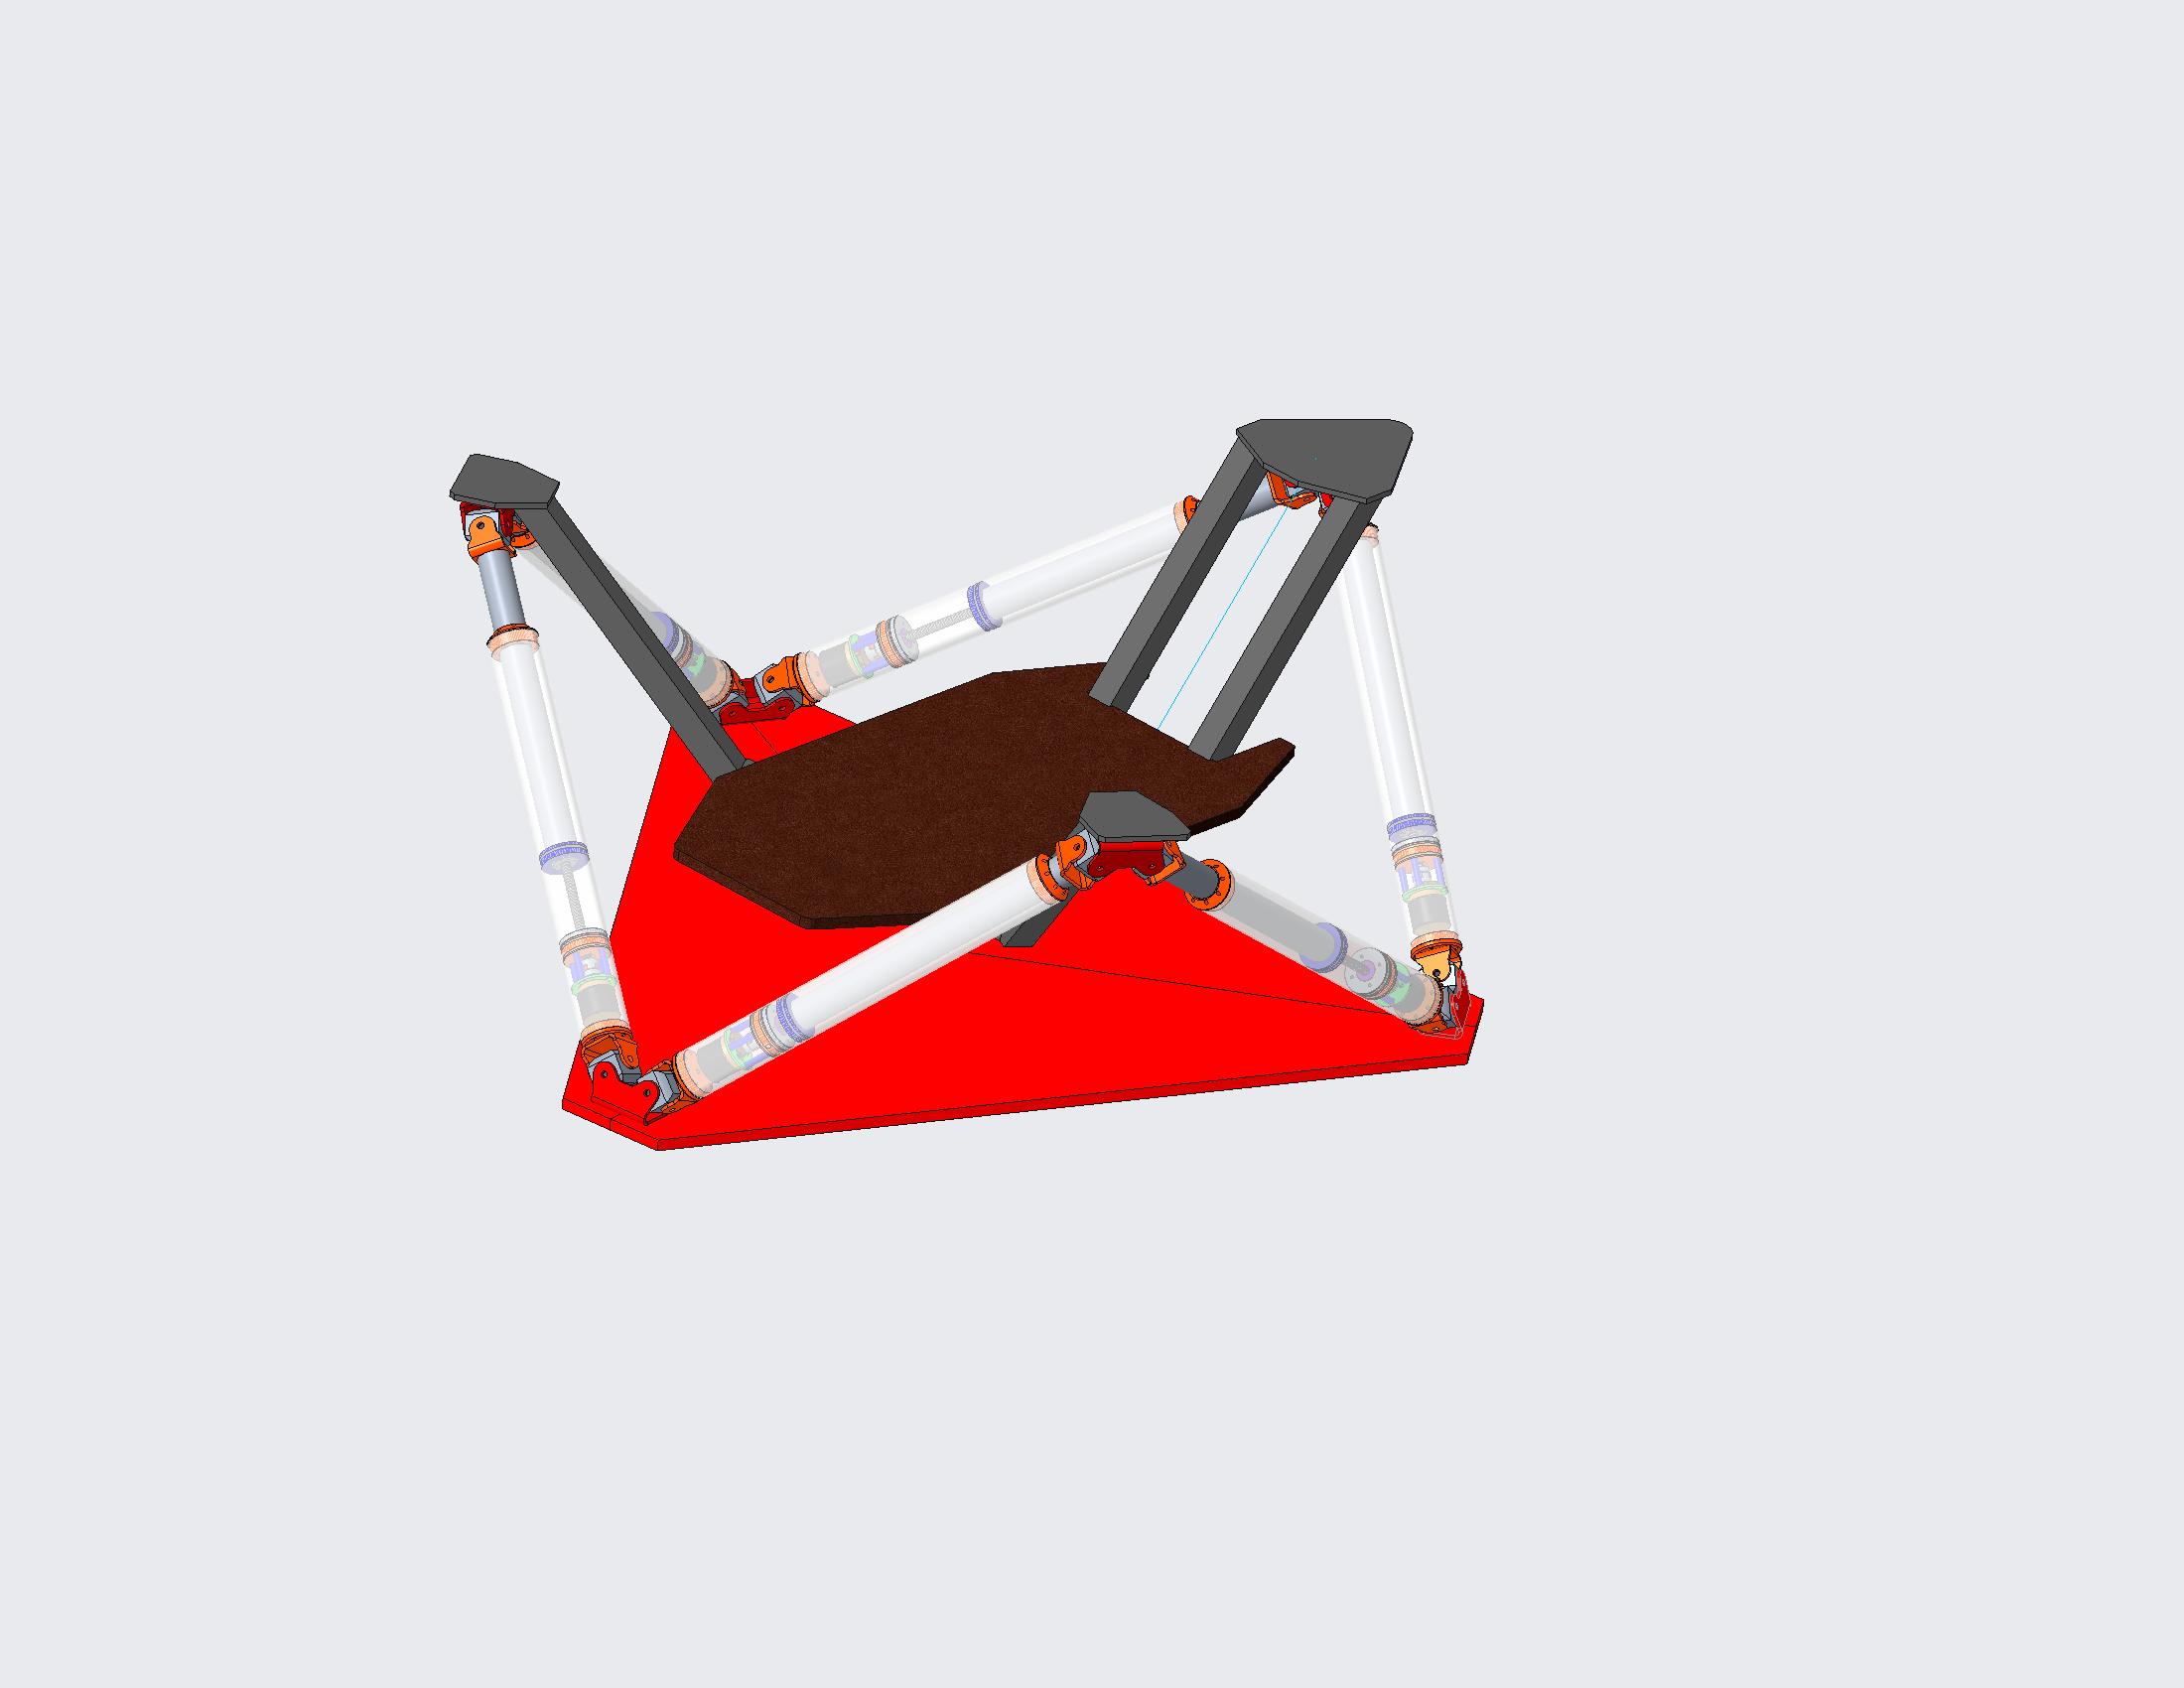
Here is a first picture of my current CAD-Model. Thats still in progress but did a good job for the preliminary movement-studys and finding out good overal dimensions.
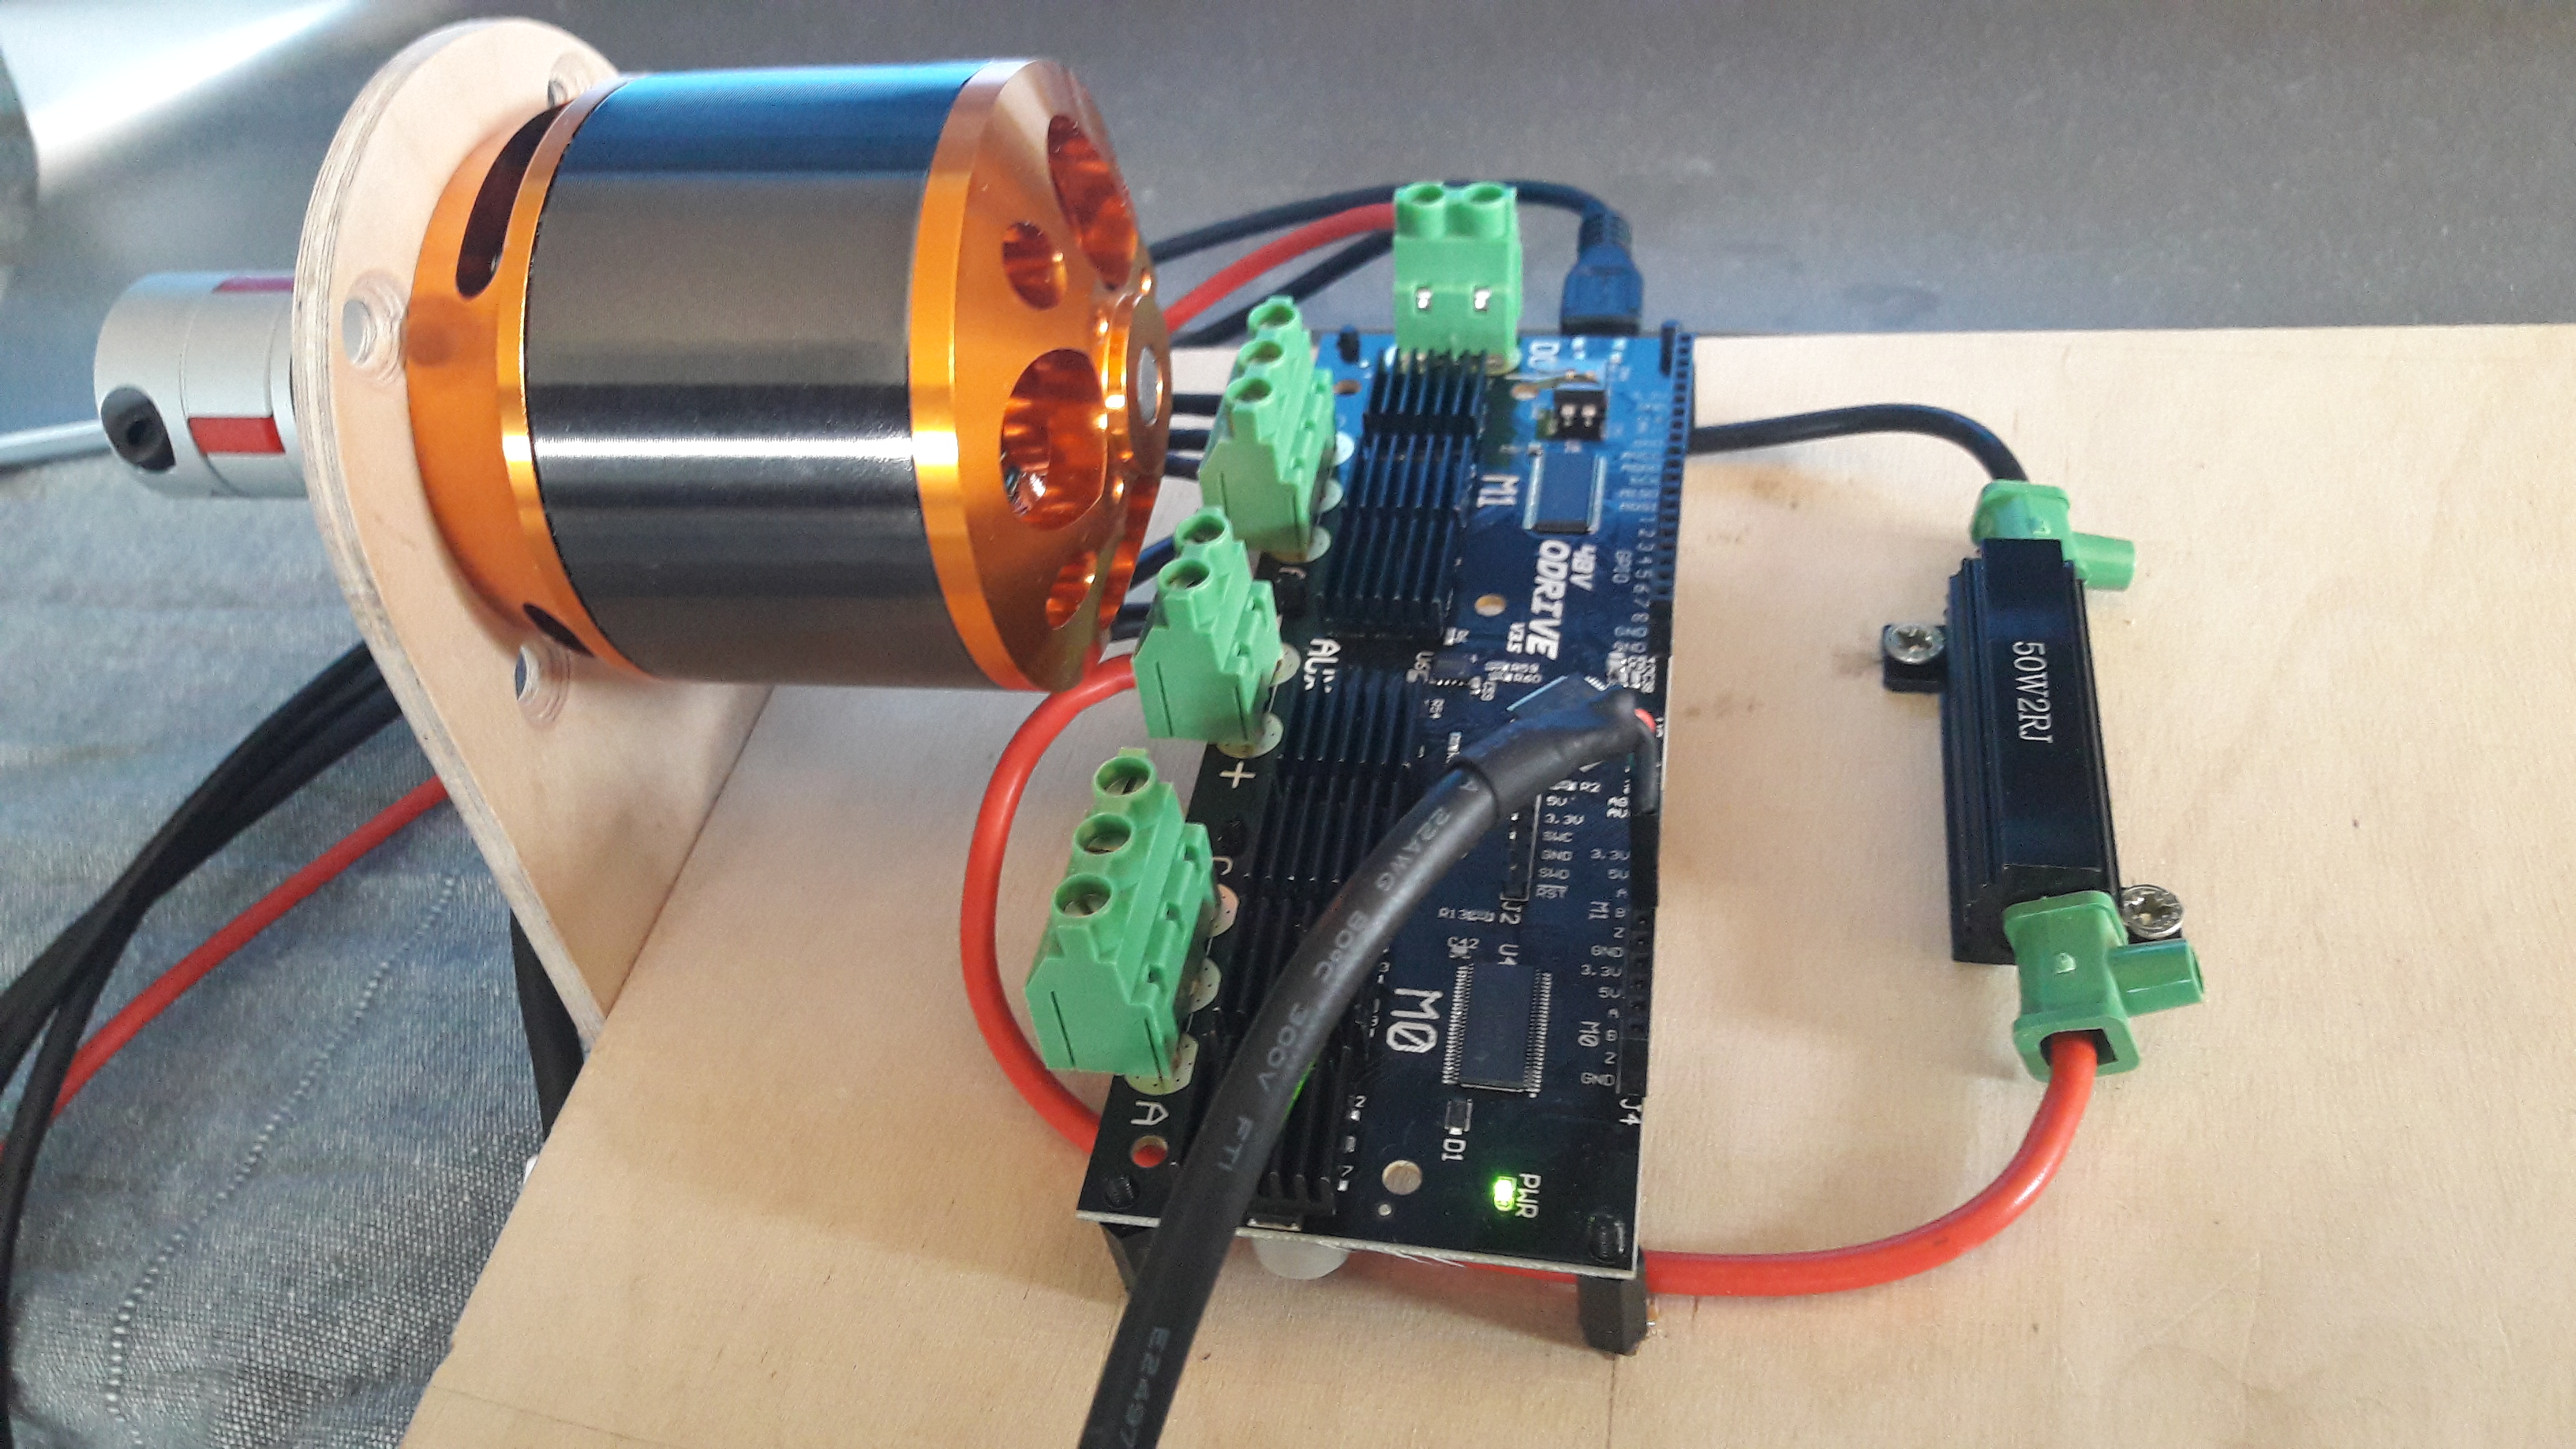
Motor: hobbyking KEDA 63-64 190KV Brushless Outrunner (2000W max.)
ball screw: 1605 (600mm Long)
Encoder: AMT102 from ODrive
usable length of actuator-motion: approx 450mm (+20mm safety travel each side)
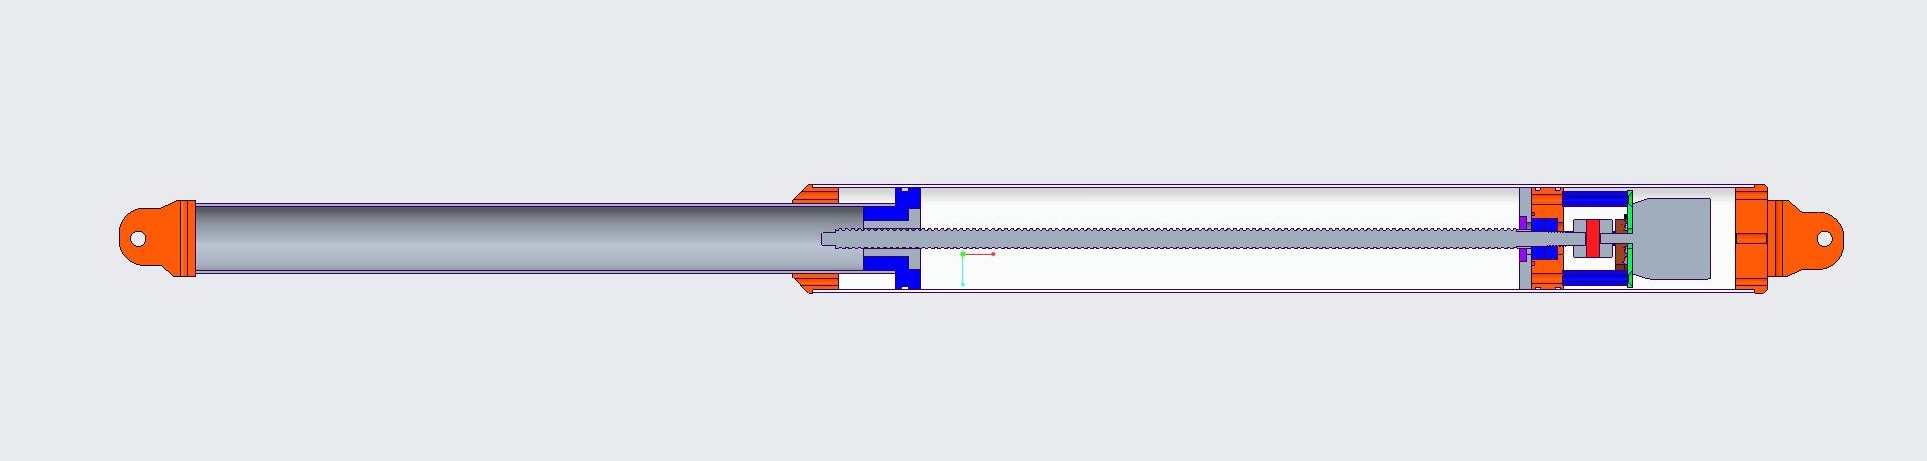
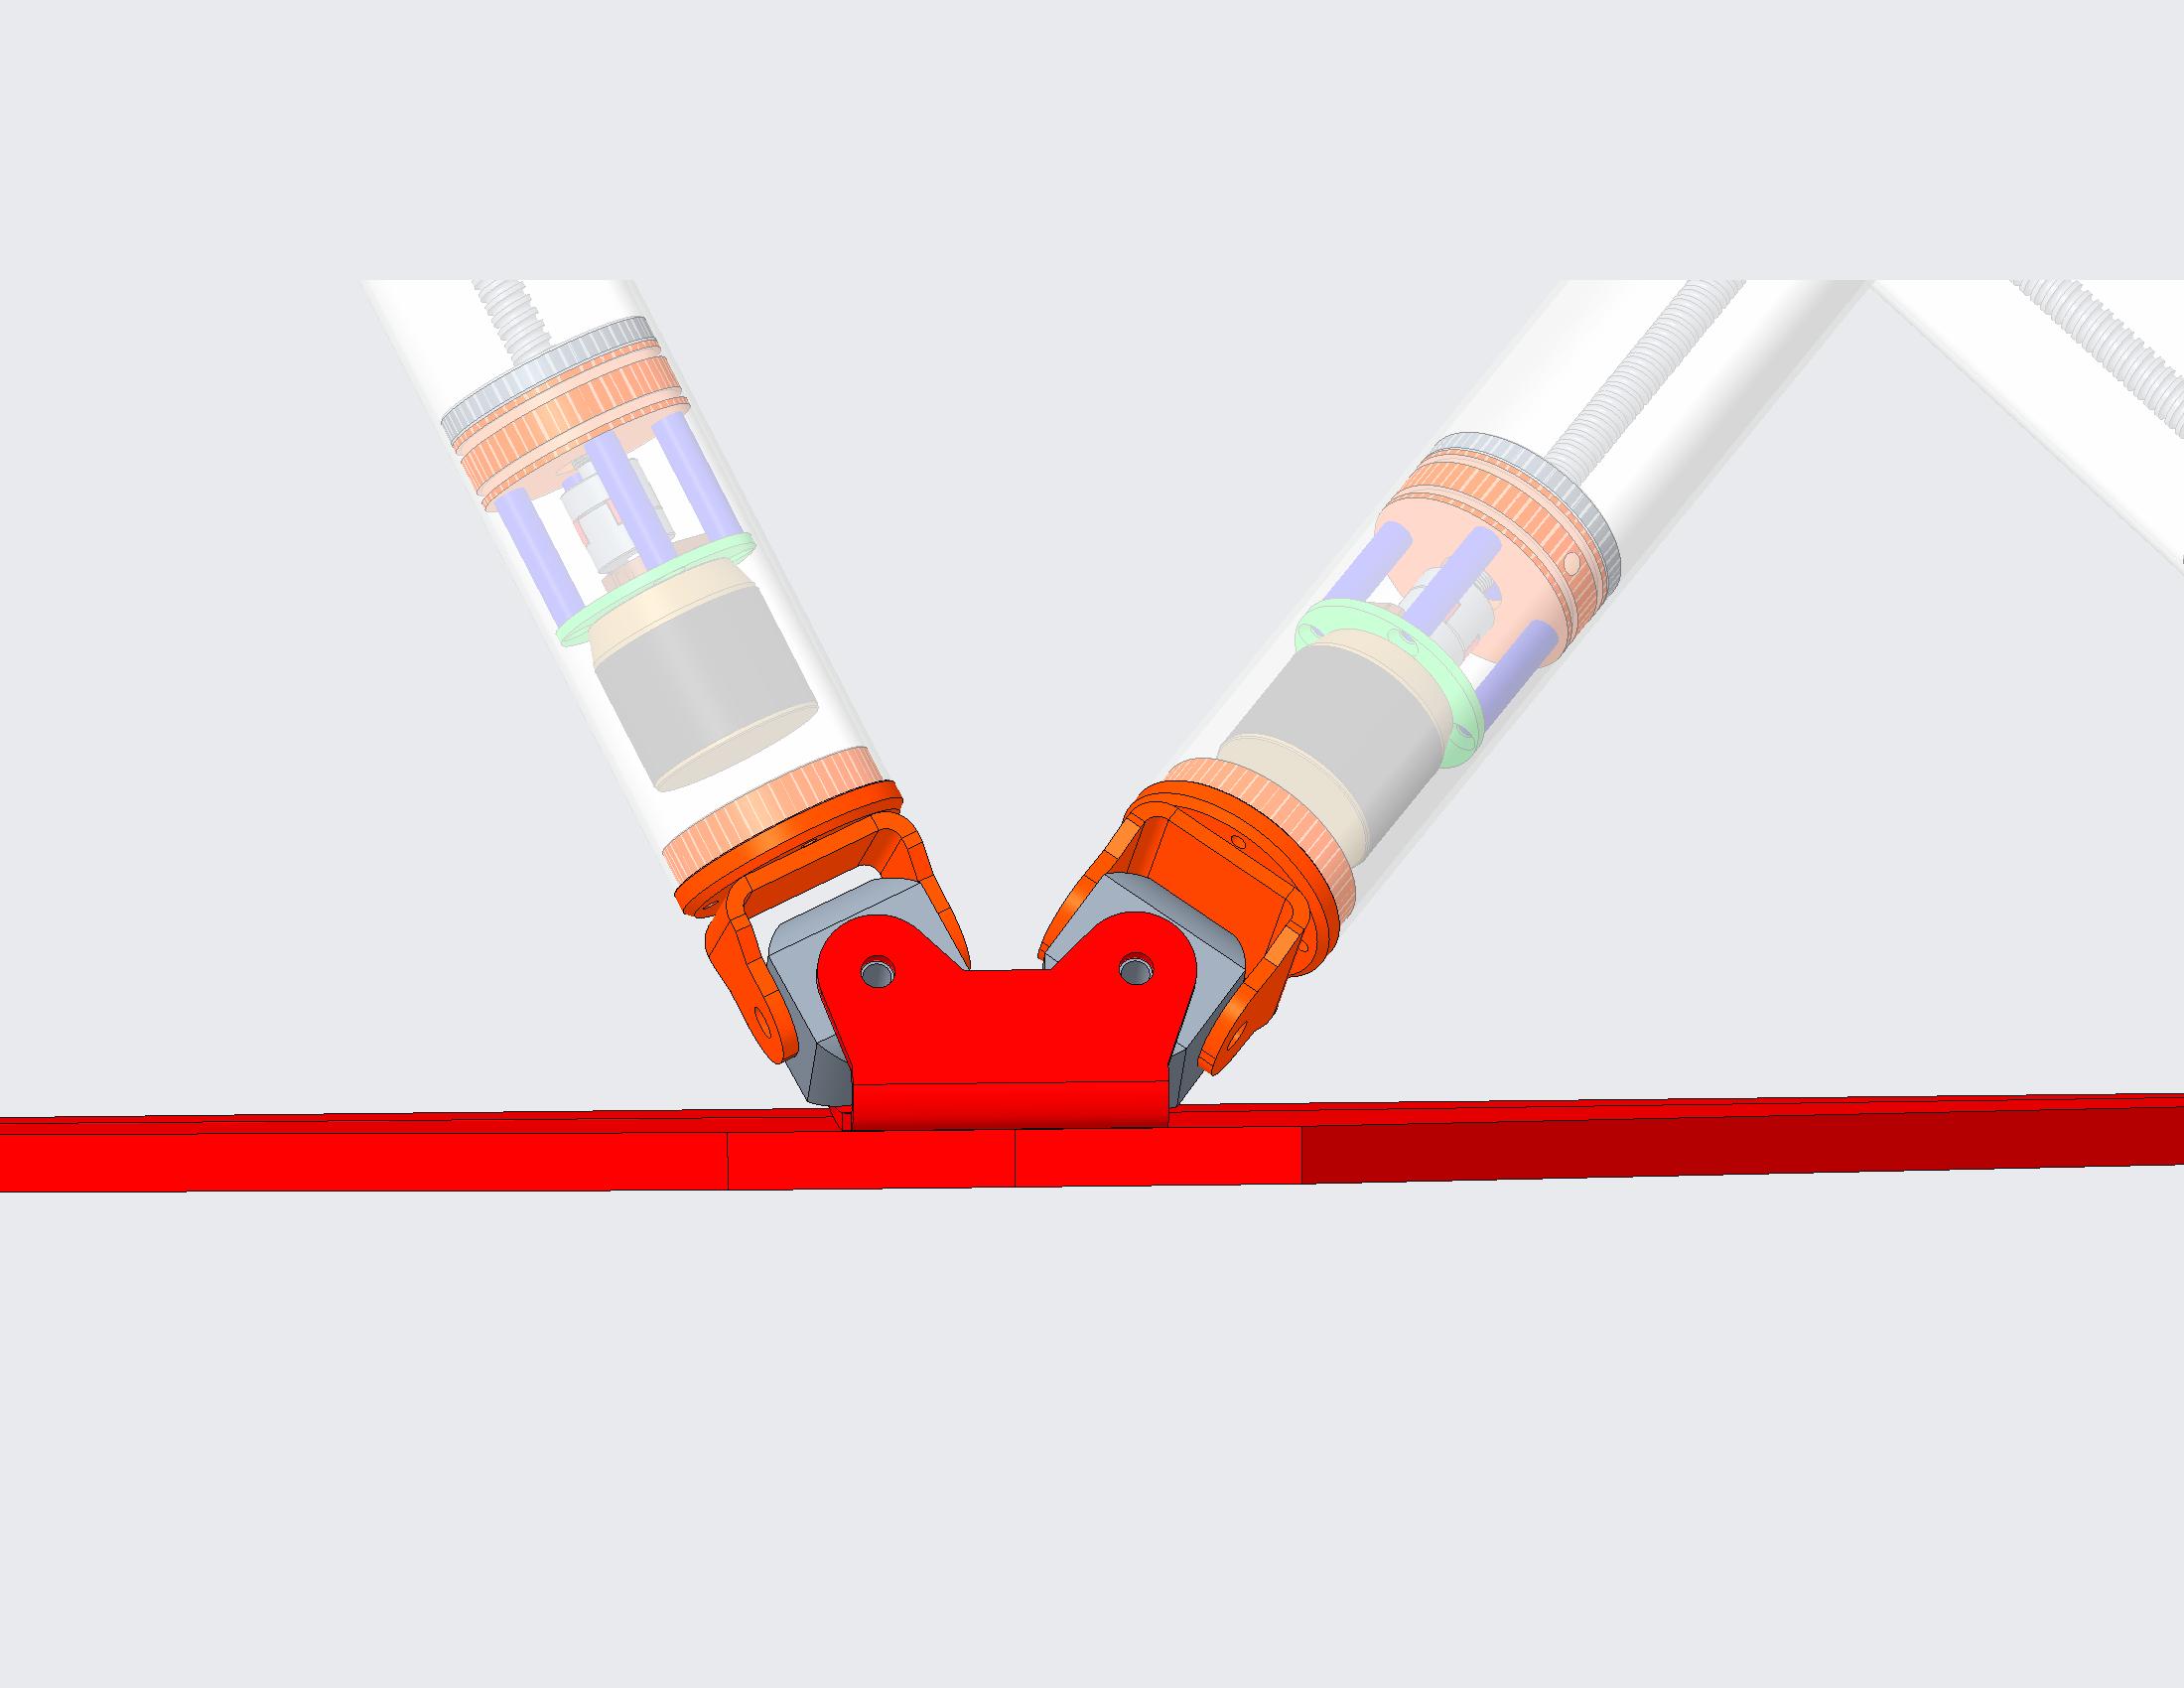
The two pictures show my actuator in the retracted and extended situation.
The piston rod itself is part of the pressurised system for the air spring -thats the reason for beeing so thick
So at the end of the introduction of my project I have reached the following status:
I downloaded the odrivetool and simtools and after some trials i was able to run the calibration sequece…it worked and I am super happy !!!
But… now I am standing in front of a mountain called “software” and every code thats written in the tutorials seems to be chineese language for me.
Maybe somebody (…,Zennix? Stijn?,…) could give me some hints on how to continue ?
My main questions:
Do I have to follow all the settings listed in “Configure M0” before I can continue/ see wether the motor and simtool is working together?
After reading different threads it seems to me, I have to write some kind of “software” in order to fix the right settings and start-procedure…oh man…thats way too complex for me!!
(It´s 30 jears passed when I learned simple “Turbo pascal”…)
So my question is: how can I get a working *.config, without beeing a software-developer?
How can I manage to see the complete *.config (?) At the moment I can only see the current commands in the “Anaconda-prompt”
Thanks in advance for any hints!
greetings
Peter W.
Settings
The combination of your motor and the decoder is the standard configuration in the Odrive settings.
So, your motor is spinning without any changes.
But, later on, when you want to get some performance you have to tune it.
Firmware
If I understand your previsious post correctly, you have ODrive Tool running. With this tool you are able to set all the parameters you need and save it to the board. Also you can write a new firmware to your board. odrivetool dfu path/to/firmware/file.hex
Config
You can save your complete config with odrivetool backup-config my_config.json
Endstops
Do you need endstops? The master branch didn’t support endstops. There is a branch from Wetmelon that could do this. But it’s not merged to the official branch yet.
Connection to game engine
connect the Odrive to your gaming machnine. You will find a new seriel port.
Have a look at this: ASCII commands makes ODrive unreachable
For simulators you need only postion commands. Fast movements to a specific position. Accuracy is not the major thing. We send a position command every 20ms to Odrive. But unfortunately there is a bug in the firmware. After a few commands, Odrive will hang. I found a work around described also in the previsous link.
I wrote a little programm to test the configuration. You can find it at the same link.
After trying to write the latest Firmware with the “odrivetool dfu” command only, my Odrive is “dead” now and will not be found again when typing “odrivetool” to the prompt. Only with the DIP switch in DFU mode my computer will recognize the Odrive.
Please see my Question to the Odrive support: https://discourse.odriverobotics.com/t/error-after-trial-to-load-new-firmware/1641
OK
I will have reed-switch endstops, but I will them inplement later after my prototype will work fine.
I am so sorry, but currently I am not skilled enough to follow These steps. Maybe later….
Now, after trying lot of hours only to get the motor spinning I am a little frustrated. For me personal the Odrive does not seem to be a “enduser-finished” System yet.
For me as an software-newbe in combination with the remaining Software issues, it is a nearly undoable challange…….
Hi Wickie,
don’t be frustrated. Nobody says that Odrive is a ready build, end user friendly device. You have to read a lot and ask some people for help.
For your first question look to the thread.
For your second problem, I can not help you. I always use a ST programmer like this:
At the beginning, my ODrive was also unaccessible after rebooting sometimes… But with the programmer you can always flash the firmware again. You do not need any knowledge about editing the firmware code.
My suggestion is: prepare a development environment and buy a ST-Link.
Hi Zennix, Hi community
first I want to wish you and the comunity a happy new year!!
Regarding the ST-programmer: Now I tryed several hours to get the OpenOCD get running. But without success. Although I did all steps according to the manual my computer can´t start the program. When I open the *.exe file, the programm seem to start for a fractual second, but then…nothing. I also tryed lot of compability settings…but also without success.
(Remarking: I have a new Windows 10 computer with an i5 processor and RTX-graphic card - so no old stuff)
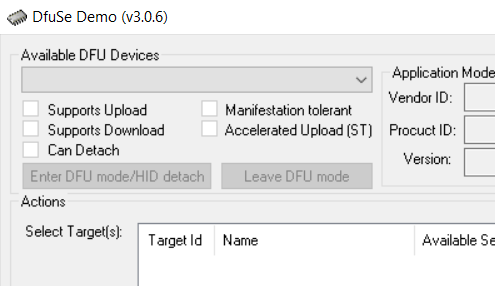
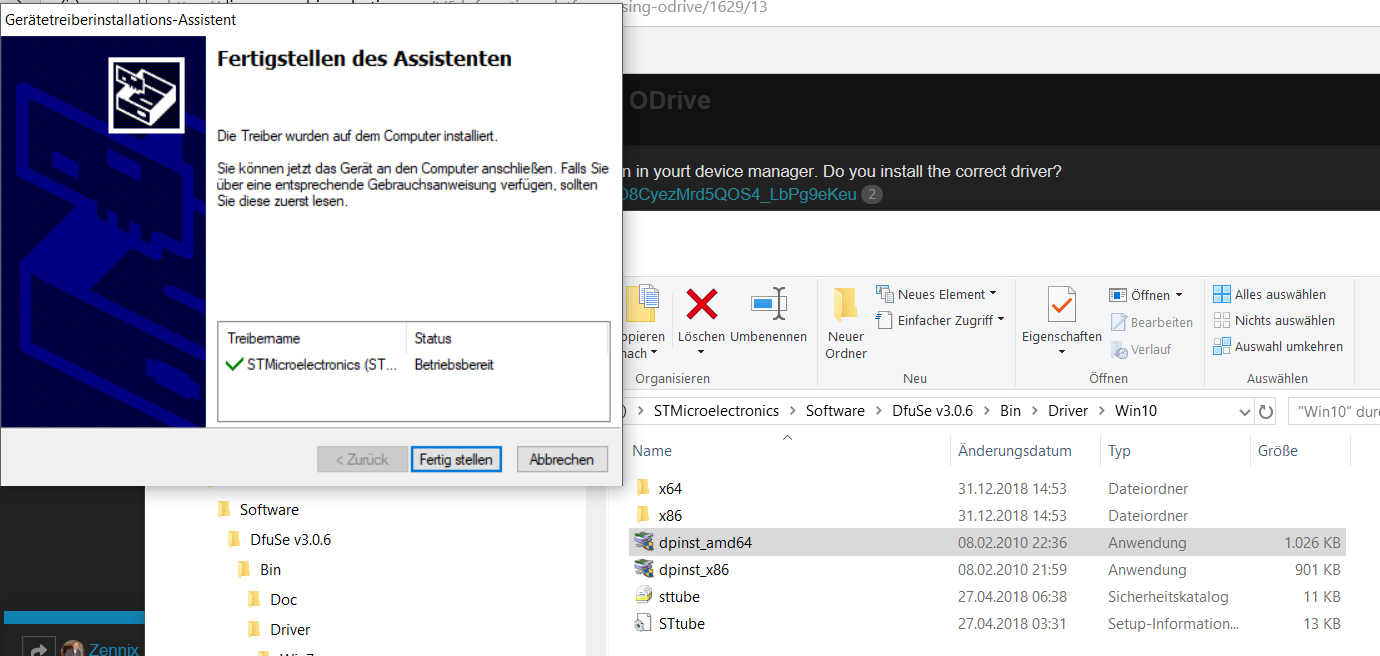
So I swaped to an other DFU-tool called “DfuSe”. Its recomendet in the chapter: “Upgrading firmware with a different DFU tool”.
After installation the program is now running .
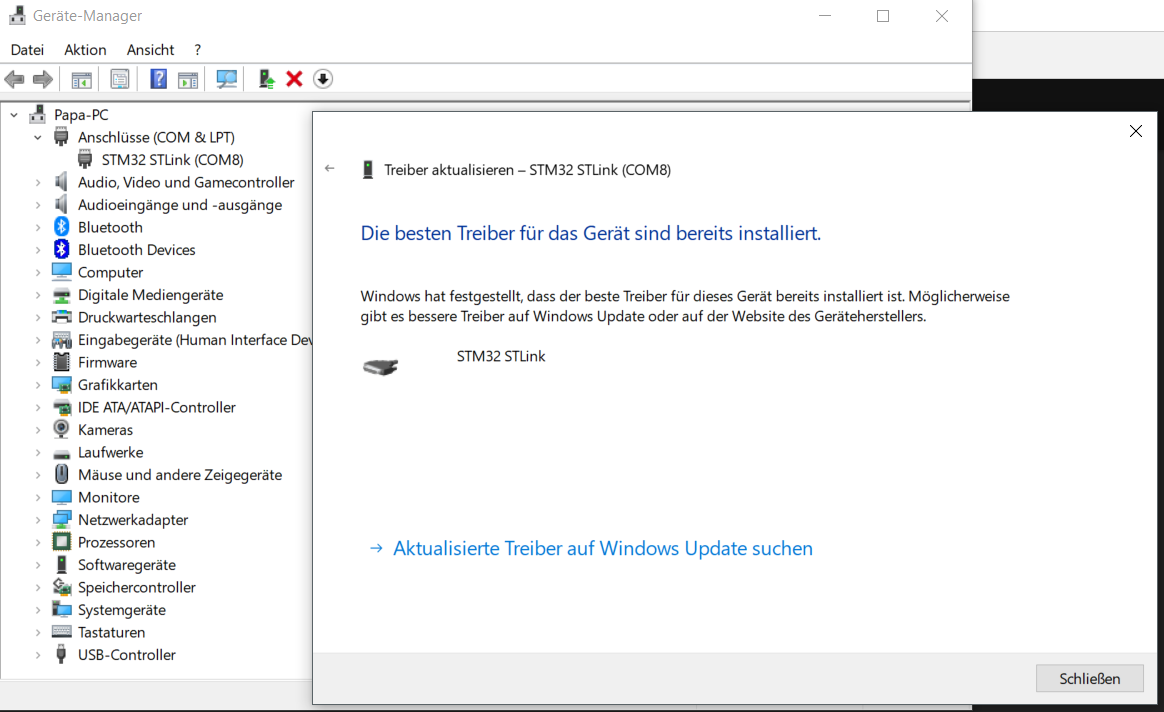
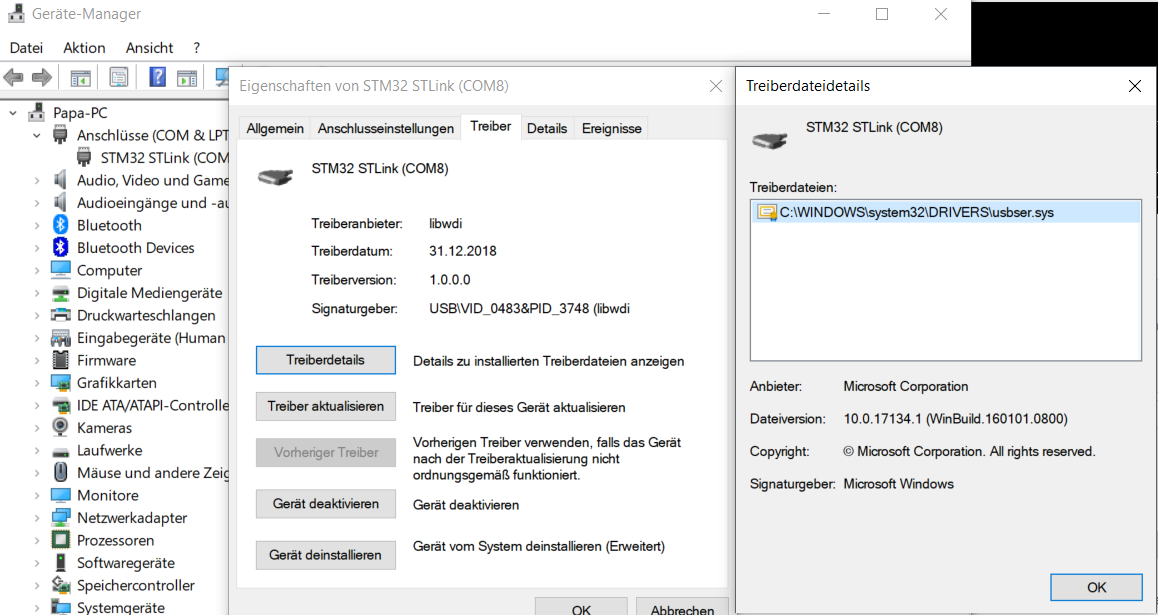
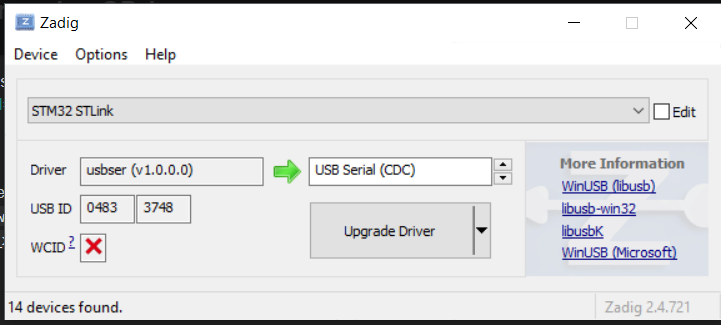
But it does´nt recognise the ST-Programmer (Available DFU Devices).
I changed the drivers with the Zadig-tool several times, used a second ST- Link (I ordered two), forced the Odrive in DFU-Mode, changed the USB-Ports, rebootet my computer and the Odrive, checked all wiring …but…nothing, the program does´nt recognise the ST-Link!!
Something goes completely wrong…
Anybody in the comunity with any ideas, same experience ?..
One example of compatible drivers are the ST-LINK/V2 USB drivers, from ST, available as part number STSW-LINK009. Download the stsw-link009.zip archive, extract its content to a separate folder, and run the dpinst_amd64.exe (or dpinst_x86.exe ) with administrative privileges.
I followed the Manual you mentioned (https://docs.odriverobotics.com/configuring-vscode.html)
a few steps, but I a am sorry…thats much, much, much too difficult for me.
I have a collegue at my work and he is a professional programmer…maybe he can do this steps for me.
Hi Peter,
thats really great that you made it.
You are now half the way up the “software mountain”
The master brunch has some issues if you try to use the serial command interface like we have to. Also it didn’t support end switches.
The branch with end switch support comes from wetmelon and is located here: https://github.com/Wetmelon/ODrive/tree/Endstops
How to use it:
I downloaded the latest version and did the fixes for you.
Hi Zennix!
thank you so much for your help and efforts! I appreciate this very much!
I imediately flashed your custom made firmware and it works so far, but I have some errors codes I have to check for the next days.
I am not sure how to connect the end switches to the Odrive. I think the connection has to be made from GPIO Pin 8 to GPIO Ground or any voltage pin?
Do I need the switches for the startup procedure or can I test your firmware without switches (maybe temporary disable the switch in via the config?
best greetings!
Peter W.
Hi Peter,
there are a lot of additional settings through the ODrive Tool. Please have a look to the thread I have shown in my last answer.
You have two switches per axis. So you will need 4 GPIs for two axis. You have to enable the endswitches otherwise it’s like a normal branch firmware.
I have my switches active low, means switches GND to the GPI but you can define it in the settings too. I had some debouncing, therefore I connected some caps between the GPIs and GND. Described all in the upper thread.
Greetings / Zennix
 ), which I built a few years ago for my son from scratch. The air spring works so well and was so easy to build, that I want to implement this in my actuators. Hopefully, the benefit will be that I can reduce the idle load of the actuators to zero or even better to support them in vertical accelaration…